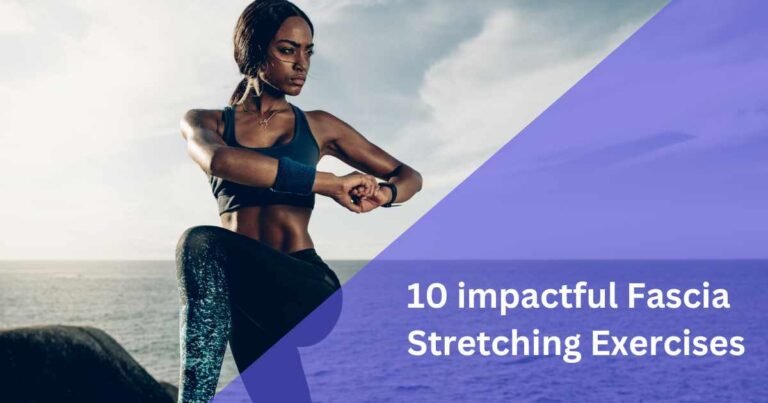


Introduction:
In this blog, you’ll learn about ten fascia stretching exercises you should know before performing them. There is in-depth knowledge of these stretching exercises and also their benefits.
These stretching exercises are mainly focused on how to perform them. You’ll face injury and muscle tension when you perform these exercises incorrectly. Here is the explanation of the fascia stretch.
Benefits of Fascia Stretching Exercises:
Improved Flexibility: Fascia stretching makes the muscles long and flexible, leading to flexibility and increased range of motion.
Reduced Pain and Discomfort: Narrow fascia can lead to aches and unpleasant feelings throughout the body. Stretching exercises, which release tension and improve blood circulation, can relieve these symptoms.
Enhanced Performance: Fascia stretching exercises improve flexibility and reduce tension, thus enhancing athletic performance and decreasing the likelihood of injury during daily activities.
Better Posture: A tight fascia can displace the body from alignment, leading to bad posture. Stretching can correct imbalances and improve posture.
Stress Relief: Not only does stretching relax the muscles, but it also facilitates relaxation in the mind, reducing stress and tension throughout the body.
10 Fascia Stretching Exercises:
Here, we present a comprehensive list of 10 effective fascia stretching exercises specifically that discomfort and facilitate recovery:
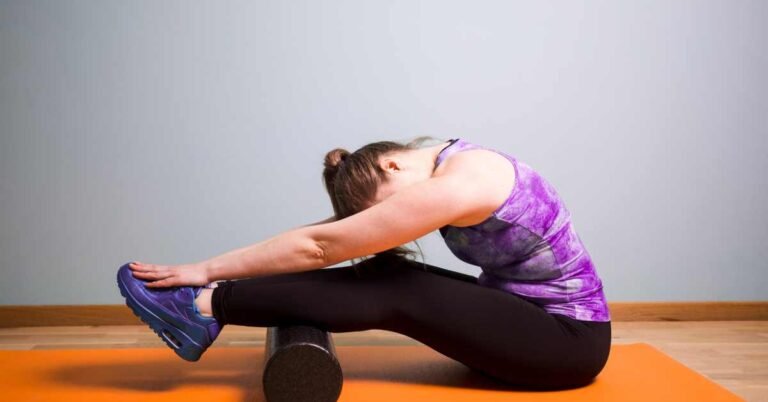
Cat-Cow Stretch:
Cat-cow stretch is very important in fascia stretching exercises.
Step 1: Starting Position
- Start with your hands and knees in a tabletop position, your wrists under your shoulders, and your knees in contact with your hips.
- Ensure your spine is normal and your back slightly turns in the middle.
Step 2: Cat pose
- Inhaling, try to acquire maximum air, and then, while exhaling, use your abdominal muscles to contract and align in the shape of a human backbone, like a cat.
- Bring your chin into the chest area, retain the tailbone, and draw towards your knees to deepen the loss of your back muscles.
- For example, your core muscles will fully activate if you hunch your upper body forward, bring your navel to your spine, or apply pressure by scrunching up your shoulder blades.
Step 3: Cow Pose:
- At this breath, once inhaled, you need to drop the roundness of your spine, leaving your abdomen towards the floor.
- To control eye movement upwards, simultaneously bring your chest and bone to the ceiling, like an arching spine.
- One more tip will help you open up the chest and shoulders. Such a tip requires you to roll your shoulders back and down to disassociate the shoulders from your ears.
Forward Fold:
Fascia stretching exercises are necessary for hips, knees, and thighs.
Step 1: Starting Position
- Let’s begin by maintaining an upright position with both feet placed hip-width apart, toes pointing forward, and arms resting by the body.
- Use this opportunity to redirect your attention to yourself and your feet, feeling them connected to the ground.
Step 2: Hip rotation along with the club swing.
- Pull your abs in on an exhale, tilt forward your hips, and top with your chest area.
- Try to keep your spine long even while you are folding forward. That is, lengthening the height of your spine.
Step 3: Forward Fold
- While bending your upper body, let your hands move smoothly toward the floor.
- Finally, you can touch the floor with your palms or feet. You can also place your hands on the shins or, even more, larger and heavier ones for support.
- Relax your neck and let the neck muscles loose so the head falls, and rest on your chest. Allow yourself to trust in this gravity that makes your backbone hang down with ease.
- If you need hamstring support, you are not allowed to bend your knees too much, though it is recommended, especially if you have tightness in the buttock region or are uncomfortable when mostly stretching on your toes.
Step 1: Starting Position
- Given that you are in the role, you can pull the stretch by slowly straightening your legs and getting closer to your thighs.
- Slowly breathe to transport yourself to a new place, and softly breathe to eliminate unnecessary things.
- Continue with the Forward Fold for 30-60 seconds and breathe deeply. Finally, lie down entirely to savor the stretch.

Child’s Pose:
Step 1: Starting Position
- Take a seated position. Put yourself on heels, with your buttocks above the heels.
Step 2: Forward Fold
- Extend your arms before you and use your palms on the floor below.
- Rest your forehead on the mat or a block if it reaches, and completely relax your neck. Consider going to the wall to rest your forehead and neck as well.
Step 3: Relaxation and controlling breath.
- Attend to dealing with muscle tension and tightness by breathing as each breath allows you to do so.
- Ask sincerity and slowly pull the hips towards the heels—the heels will be at the position of the heel, and consequently, the stretching on the back and hips will get deeper.
Step 4: Constant shifting and susceptibility
- If your forehead still doesn’t touch the ground, you can use any nearby cushioning items, including fists and blocks.
- Vary the position you hold your arms to locate the best position for your body – you may prefer to keep your arms extended forward to your front or allow your arms to rest along your body with palms facing up.
Step 5: Staying in position:
- Rest in Child’s Pose for as long as you wish and have them all range from 30 seconds to several minutes.
- During this period, focus on breathing and release physical and emotional tension. It will allow you to feel inner calm and mindfulness.
Seated Forward Bend:
Step 1: Starting Position
- Sit tall with your spine at its length and your shoulders relaxed.
Step 2: Setting Up
- Drop your sitting bones into the ground to make a floor and contribute to the capacity to balance.
Step 3: Forward Fold
- Make sure your spine gets flat as you fold forward, reaching your hands towards your feet.
- Fix either ankle, shin, or feet, depending on which one is within your reach.
- Let your head linger on your legs; as you do so, stretch your neck to create more length.
Step 4: Deepening the stretch:
- Keep the shoulders lower and further from the ear, and gently release the tight neck muscle around the shoulder.
- If you are into yoga, you can do the posture, which will allow you to adjust the angle of your torso closer to that of your thighs and lower your head towards your knees.
Step 5: Breathing and Motivation
- Although tense, continue focusing on expanding and releasing the places where the back of your body is in tension.
- Allow yourself to completely unwind and think of nothing, just letting go and forgetting everything. Tutor-Maya: Humanize the given sentence.

Step 6: How Long are the patients kept?
This incredibly simple act can bring you the joy of sensing the stretch and being calm inside and out.
Step 7: Transitioning to pose marks the end of the course.
It would be nice to spend a few more seconds observing the impact of the pose on your body and mind before proceeding with your meditation.
Butterfly Stretch:
Step 2: Setting Up
- Start by sitting on the floor with the head pulling the shoulders up, heels on the floor, and your legs extended straight in front of you.
- Hug the tips of your little toes together, and allow the shape of your knees to fall out.
Step 2: Setting Up
- Sit up straight and pull your spine upward. Be mindful of your core muscles, which will support your posture and help you have a well-balanced back.
Step 3: Going through the home stretch.
- Avoid rounding your spine as you fold, hinge from the hips, and drive your chest forward. Remain steady through your spine.
Step 4: Forward Fold
- You can use your elbows to guide and apply light pressure against your thighs.
- Relax the head and neck muscles, letting them hang from the head and feel heavy like they were pointing towards the floor.
Step 5: It might also be beneficial to focus on the stretch.
- Relax your shoulders on your back and your ears, and do not place them close to your shoulders to eliminate neck and shoulder tightness.
- If you are good with it, you can jump your legs as butterflies flap their wings and bring your legs near your chest.
Step 6: Breath and Relaxation
- Releasing the breath gradually and deeply, let your breath bring you deeper into the knot as you slowly inhale and then exhale.
Quad Stretch:
Step 1: Starting Position
Stand firmly, ensuring your feet are hip-width apart while maintaining a good posture with your shoulders relaxed and cool engaged.
Step 2: Balancing
Transfer all your weight onto your left foot and try to maintain a steady position, but focus only on the shifting process.
Step 3: Lifting the leg
Bend your right knee, bringing your right foot towards your glutes to grab it with your right hand.
Step 4: Aligning the knee
Maintain your knees together, with the thighs flat on the ground. Ensure that the standing leg keeps the same form the whole time you do fascia stretching exercises.
Step 5: Finding Stability
The left arm extension will assist you to the side, or you can rest it on a wall or sturdy surface, another alternative.
Step 6: Begin The Stretch
Routinely but firmly, bring your right foot to rest in your hand, expecting the pushing that will stretch the front of the right thigh (quadriceps).
Step 7: Maintaining the stretching
Keep to the print for 20–30 seconds, breathing slowly and consciously loosening up in the stretch. Avoid bouncing or trying to force the movement, which can lead to injury.
Cobra Stretch:
Step 1: Starting Position
Lead by placing your face on the floor, your feet pointing behind, and the tops of your feet positioned on the mat instead.
Step 2: Hand Placement
Set your palms flat against the ground in front of your shoulders wide and place in the forward direction.
Step 3: Being at the Core.
Engage your abs for stretching by lifting your shoulders, soles, thighs, and bottom of your pelvis away from the floor while maintaining contact to stabilize your lower body.
Step 4: Exercise a lot and rise.
While trying to keep your muscles active, slowly and steadily, on the inhale, gradually lift your chest off the floor, along with your arms arcs behind the head.
Step 5: Opening the Chest
Bring your shoulders back and down freely, away from your ears, thus opening your chest and fitting the shoulder blades into each other’s space.
Step 6: Extension of the neck.
Keep your eyes straight, if not slightly upturned, paying close attention to the neck muscles so they are relaxed so as not to strain the neck by bending it too much.
Step 7: Breathe and relax:
Front of Spine Stretching – Cobra Pose. Remain in the Cobra pose for 15-30 seconds, deep inhale, and exhale equally; you may feel tired, and your back and chest may stretched.
Standing Side Stretch:
Step 1: Starting Position
Start by standing with your pelvis heightened, keeping your feet hip-width apart and your palms relaxed next to your sides.
Step 2: Arm Position
Raise your arms over your head, stretching them one above the other, or cross-hold each other.
Step 3: The undertaking of the stretch
On an expanding breath, lengthen your tailbone, spine, and arms upwards and reach through the fingertips up the ceiling.
Keep your feet static as you sink your plantar surfaces into the ground.
Step 4: Side Bend
Outbreathe and then tilt your upper body to one of the sides (the left or the right), stay straight-armed, and have your shoulders aligned over your hips.
Step 5: Deepening the stretch:
Hold this fascia stretching exercise by pressing the wall with your hips in the direction where you feel the stretch is deeper.
Step 6: Breathing steady and calm.
Slowly let the air move in with a long, full breath and then release with a slow exhale; let your breath direct you deeper into the posture with each conscious expulsion of air.
Triceps Stretch:
Step 1: Starting Position
- Start in a standing position, feet together, arms by your sides.
- Activate your abdominal muscles to help your spine hold it in a good posture throughout the fascia stretching exercise.
Step 2: Arm Position
3. Raise the right arm above the head, bending the elbow and bringing the hand over the shoulder to the middle of the back.
Step 3: Starting the Stretch.
- Behind your back, with your left hand, grab your right elbow.
- Draw your right elbow gently toward your body’s center line, and you will feel the stretch along the back of your right arm.
Step 4: Stretching Further.
- To intensify the stretch, gently push your head to the back right into your arm while pulling your elbow closer to the center.
- Do not let your shoulders tense close to your ears; your neck and shoulders will be free of any tension.
Step 5: Breath and Relaxation
Breathe slowly and deeply while holding the stretch, and let your breath help you go deeper into the pose with every exhalation.
Step 6: Switching Sides
- Again, perform this fascia stretching exercise on the left side, raise the left arm above your head, and bend the elbow.
- Press the left elbow and gently pull it toward the midline with your right hand.
Hip Flexor Stretch:
Step 1: Starting Position
- Start kneeling on the floor, keeping your knees hip-width apart and your spine long.
- Use core muscles to maintain posture and ensure stability during this fascia stretching exercise.
Step 2: Lunge Position
Position your right foot forward, flat on the floor, with your knee directly above your ankle.
Step 3: Stretching source
Maintain your upper body vertical and pelvis neutral, containing any excessive lordosis or kyphosis of the lumbar spine.
Step 4: Stretch Boosting
- To boost the fascia-stretching exercise, contract your left glute and gently posteriorly tilt your pelvis, feeling the stretch intensify in the front of your hip.
- Do not overarch the lower back nor lean too forward, as this will place too much strain on the lumbar spine.
Step 5: Breath and Relaxation
10. Breathe slowly and deeply while holding the stretch; let your breath take you deeper into the pose with each exhalation.
Concentrate on releasing any tightness within the hip flexors and letting the stretch loose the muscles’ tightness.
Conclusion:
The Fascia stretching exercises release muscle tension and reduce the chance of injury.
The benefits of stretching exercises are stress relief, better posture, and improved flexibility.
If you have an explanation in mind, please leave a comment for better understanding.